
What is ionic?
Ionic is framework for the development of mobile app as well as web applications in faster time means no need to develop each one separately means in one attempt all can be developed. Using HTML, CSS and JavaScript we can develop ionic app. We can add any java script library into ionic project as per our requirement.
Why Ionic and why not any other native mobile development ?
First let us see what is the problem of native mobile app development tools.Before ionic there is option for the web and mobile development, take example of android studio is use for the development of android app but you can’t develop ios app and web application using it and same problem with other development also. So, every time we need to do required changes in all of them separately. Even developer must need to have knowledge of all the development tools and environments and big task is to develop all of them separately.
In ionic we develop one app and we can use it on android, ios and web. Even it gives virtual environment for testing them all at one place.
Maybe you have questions like :
Can I develop android app?
“Yes”
Can I develop ios app?
“Yes”
Can I develop web application?
“yes”
Hope, you got answer for ionic advantages over others.
Setup for the ionic
Before we start Development in Ionic, we need some software installed in system.
Follow Below steps for the installation or you can visit → https://ionicframework.com/docs/v1/guide/installation.html
1. Download and Install nodeJS → https://nodejs.org/en/download/
Right click on setup and choose run as administrator and click yes for pop up alert.
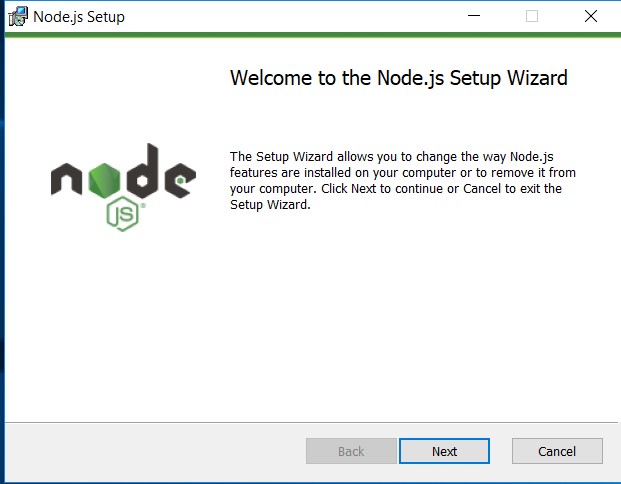
Click next for all other and complete the installation process.
Open command prompt and fire npm –version command to check NodeJS version installed successfully.

2. Install Cordova →Open Command prompt and fire command
npm install -g cordova
![]()
Open command prompt and fire comand cordova –version to check cordova version installed successfully.

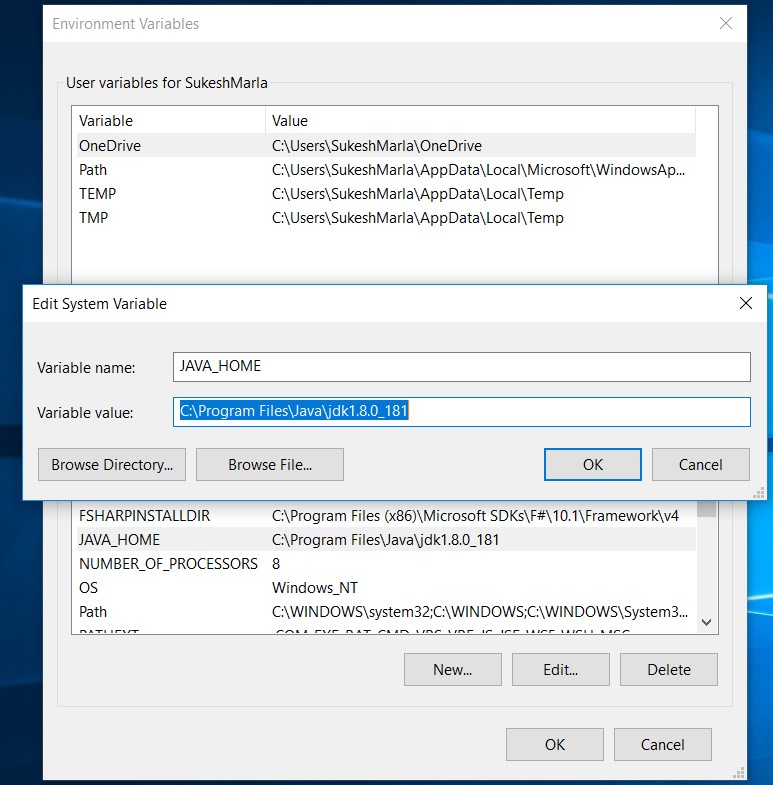
3. Download and Install Java → Use JDK 8 , JDK 9 is currently not supported by Cordova.
http://www.oracle.com/technetwork/java/javase/downloads/jdk8-downloads-2133151.html
(create an environment variable for JAVA_HOME pointing to the root folder where the Java JDK was installed.)
Note:- If you wants to do direct debugging on Mobile device or generate apk file and installing apk (apk is file similar to our google play store app) file on mobile device, then only you need Android SDK and Android Studio. Simulation environment for android, ios and web is already provided by ionic to get the look and feel, but you can’t generate executable(.apk) files.
4. Download Android SDK → https://developer.android.com/studio/#downloads (Not needed if Android Studio is already in machine). Below Image is only for reference, put your SDK path in variable value.
Update your PATH to include the tools/ and platform-tools/ folder in that folder. So, using ANDROID_HOME, you would add both
%ANDROID_HOME%\tools and %ANDROID_HOME%\platform-tools.

5.Install ionic → open command and fire command npm install -g ionic

Open command prompt and fire ionic –version to check the ionic version installed successfully.

Now, your system is ready for the development in ionic. It’s time to learn how to create project and how to build and run the project. So, we will create first simple app which show text on screen.
Now, the question is how Mobile app and web application be developed in one attempt? So let’s go and start.
First app using ionic which shows text on screen.
Note:- Flow of project we will discuss in next article, right now just follow the steps and try to complete it. It is just to build a confidence and if face any issue then we can resolve it .
Open command prompt and follow the steps
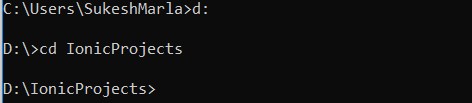
1. Change project directory path(directory where you want to create your project) I have folder name Ionic Projects in my Local D drive and i am choosing it as my project directory. See the below screenshot.
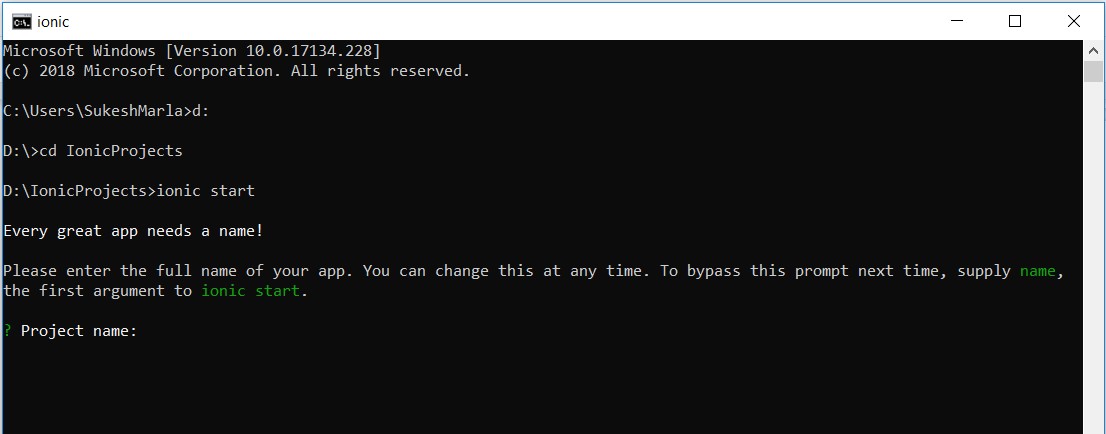
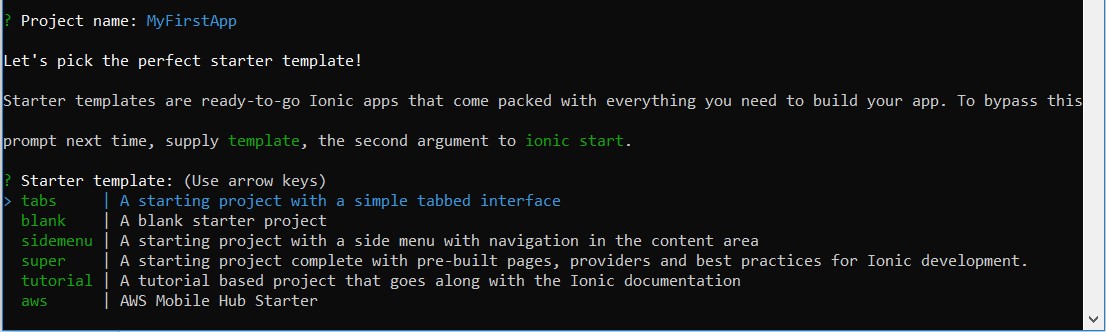
2. Open command prompt and fire command Ionic start
It will ask for project name , I entered project name as MyFistApp.
3. After project name, it will ask for starter template for the app.
For this project we will choose Blank template and NO for the next other options (later we will discuss about this options).
4. In Last it will ask for existing project and new project. We will select new project option. If it doesn’t ask then don’t worry about it.

5. Go to command prompt and change directory to project folder. See the below screenshot

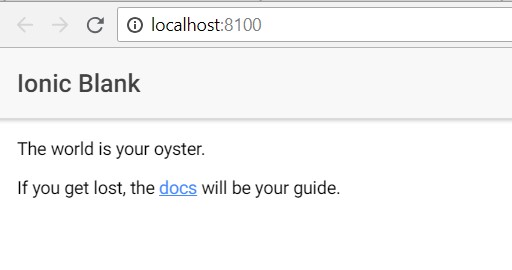
6. After changing directory to project, fire ionic serve command in same command prompt, it will run on browser.

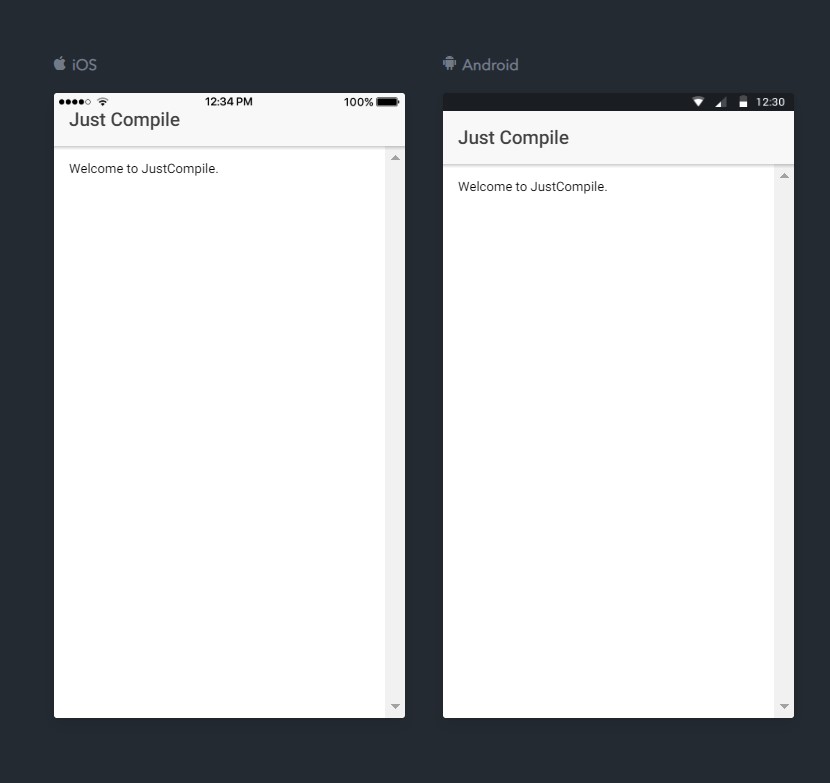
7. You will get an output similar to below screenshot and we will change it.
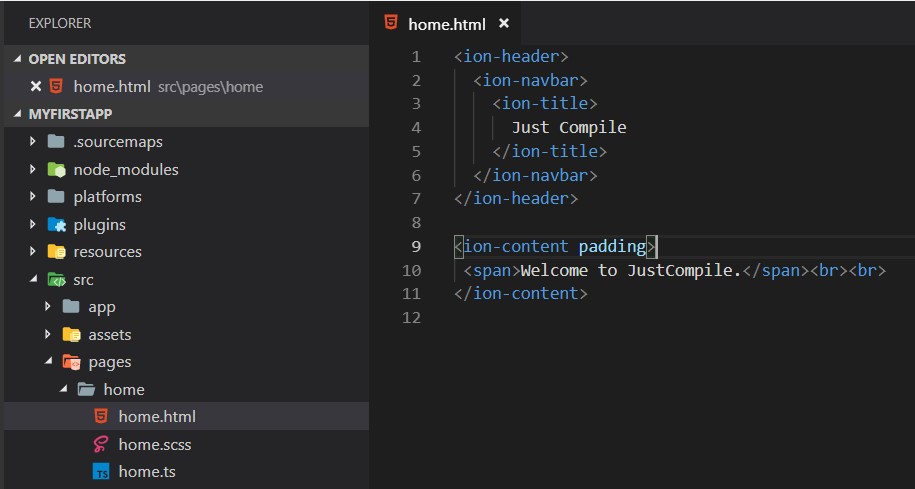
8. You can use any editor to edit code, here I am using Visual Studio Code to view the complete project directory.
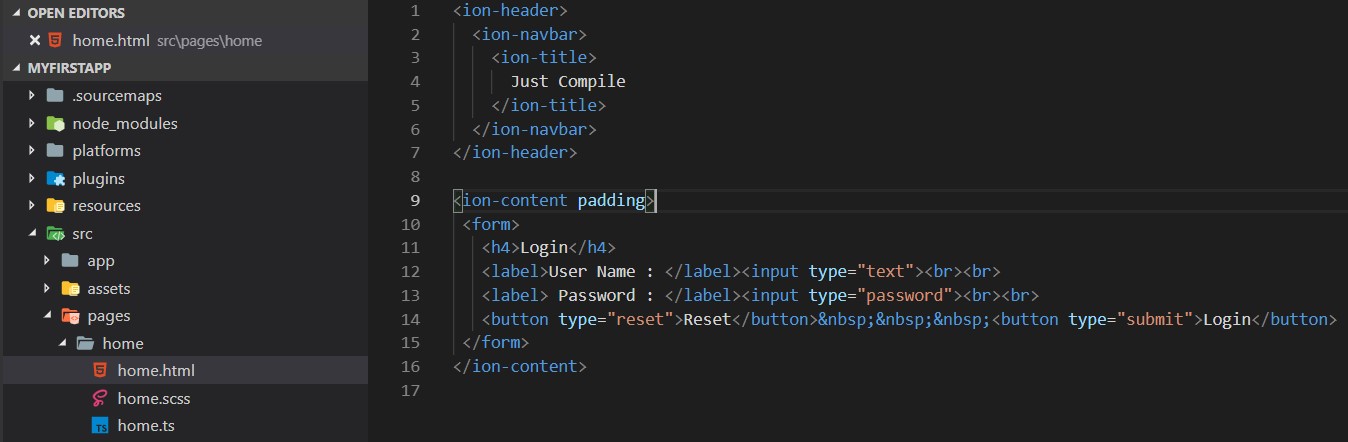
Open file “..\MyFirstApp\src\pages\home\home.html” and do some changes
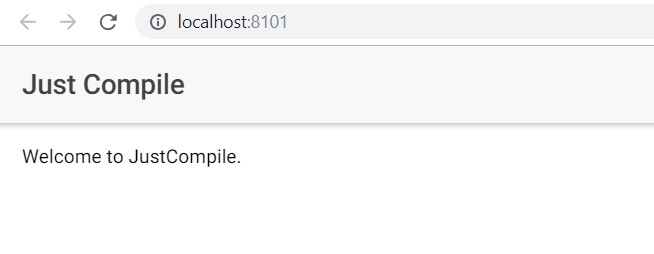
Fire ionic serve command or refresh the same page and you will get below output.
If we wants to check the same view on emulator, then just fire ionic serve –lab. See screenshot,

It may ask for download then just press Y key and then Enter key. See screenshot,

If this successfully done then it will show you the message on command prompt that development server is running and browser window opened. See screenshot,
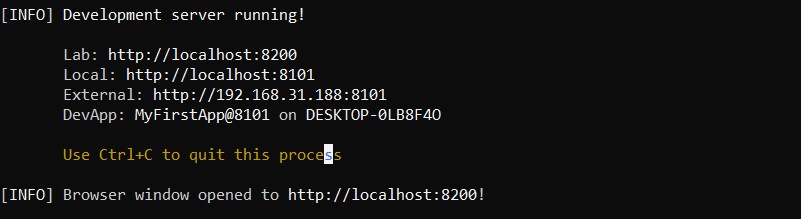
It will automatically open browser and visit the server running link. If browser automatically not opened then you can manually copy link and visit the server.
Once the browser opened, you will get an similar output in screenshot,
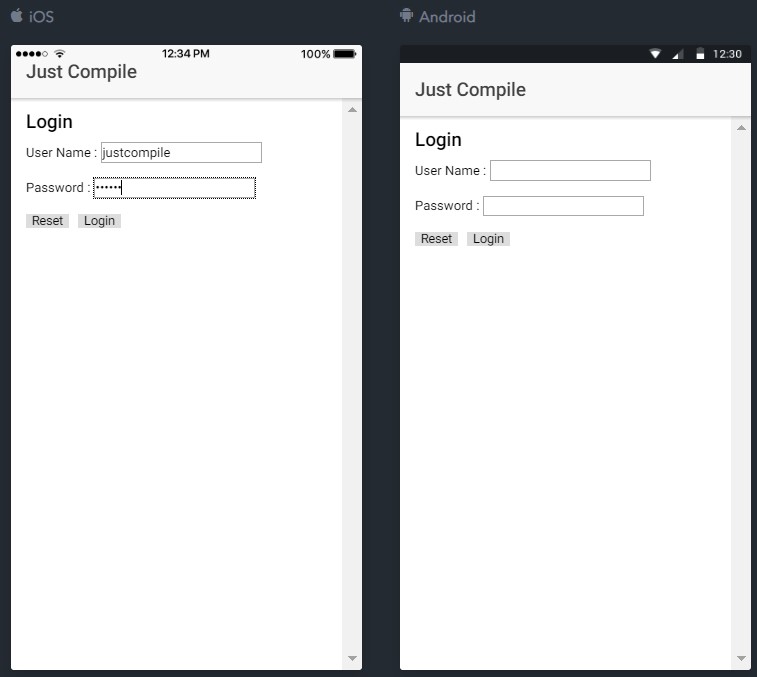
9. Lets add one form with 2 input box and 2 button in same file.
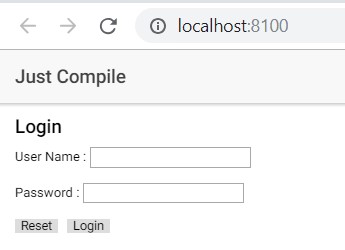
refresh the running server page and your output will change. See screenshot
How to generate .apk executable file for android device?
Note:- Android Sdk is must require, with environment variable path set.
fire ionic cordova build android to check for errors and wait for build successful and it will also show you the .apk file generated after build. See screenshot, it shows the path for .apk file generated.

See below screenshot, which shows the .apk file is generated successfully in particular path.

Copy apk to your mobile in any folder and through your mobile, click to install it. See screenshot,
Note:- If it ask for permission to install application from unknown source, then enable the application from Unknown Source option in setting in developer option.
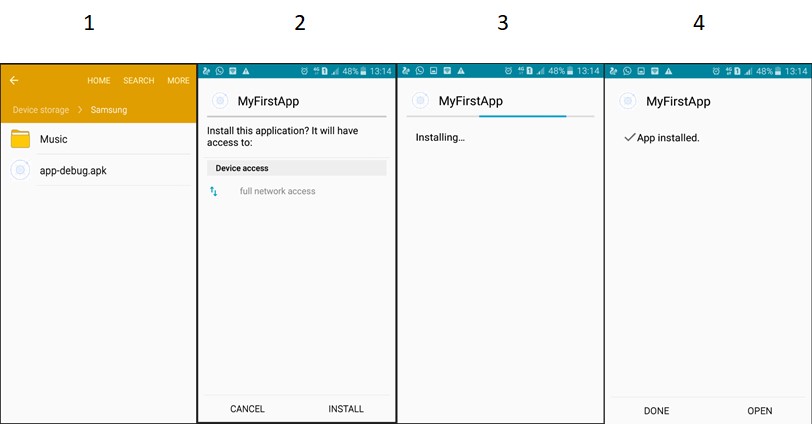
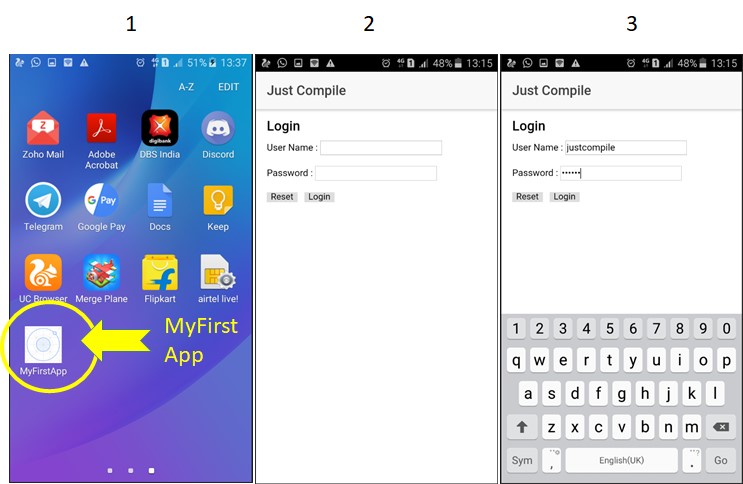
Now, this app will be shown into your application’s list with name of the project name given by you, I had name it MyFirstApp. So, it will be shown as “MyFirstApp” as app.
How to do direct debugging on Android Device / Emulator?
I will suggest to run this project on device because emulator consumes RAM memory and it will affect the system performance, it will be fine if you have 8GB or more RAM in your system.
For device connection →
1. Enable Developer option in device(it’s easier,you can watch videos how to enable it) and connect it to system using USB connector.
2. Go to setting→ Developer options→ Enable USB Debugging.
3. It may pop up for Debugging Authorization → click Allow
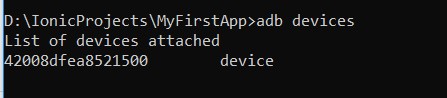
4. Fire adb devices command to check the list of connected devices for debugging.
Now, Device is all set to run android project on it through system.
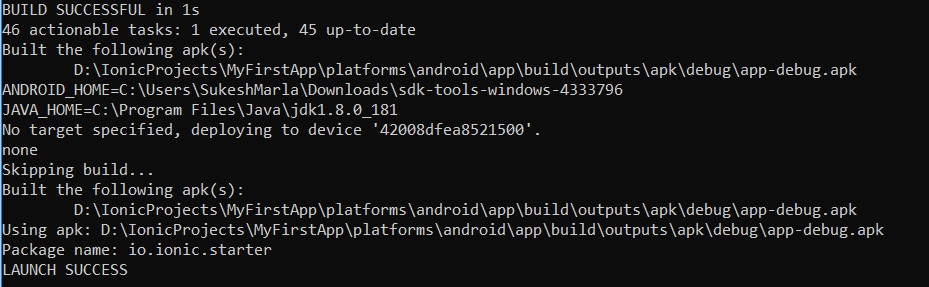
Fire ionic cordova run android to run on connected device(if there is any running android emulator on system then project will run on that emulator instead of device, so close it if you want to run it on device) and wait for launch successful. It will also show you on which device or emulator its deploying the project.
Mobile Screenshot

similarly we need to create ios development environment for ionic to develop ios app. Most of ios development tools are paid, so we had done the practical for android. But while simulation we got the look and feel of both ios and android.
In next article we will discuss about the flow of project, how to create more pages and how to select landing page and passing data from one page to another.


Nice and usefull for start
Nice and simple article to understand getting started with ionic development
Good start Parvez…Keep it up