
Complete series source code can be downloaded from GitHub.
Introduction
I hope so you have enjoyed the Journey to Station 1. Through that journey, we discovered and understood various jargon regards to Angular learning such as “NodeJS,” “npm,” “TypeScript,” etc.
Is Station 1, Station 2 these words confusing you? It means you are not following this series from the beginning.
This article is part of a series called “Journey to Angular Development”. We imagine this series as a train journey. Every time we reach a new station, we become competent into something.
Right now, we are in Station 1. I say, finish your breakfast/lunch/dinner and get into the train again as we will starting our journey to Station 2. Make sure you are ready with your coding gear. This time, we are going to do a lot of coding.
This time it’s all about ES6. Instead of directly starting with TypeScript, I thought of doing ES6 first, and then we will explore TypeScript. It will make your fundamentals very strong.
We will not cover each and everything in ES6. We will include only the most useful features, but trust me, those will be more than enough to get into action. We have broken down it into multiple articles so that nobody gets scared by one big extended essay.
Complete series (Index)
— — — — — — — — — — — — — — — — — — — — — — — — — —— — —


— — — — — — — — — — — — — — — — — — — — — — — — —
Plan our Execution environment
We will be doing ES6, and that means we are doing some more JavaScript, and that means we need an execution environment.
Let’s try to recollect what run-times we have for JavaScript. We have a browser, and we have NodeJS. We will use both of them randomly, depending on what will be the best approach.
Without any further due, let’s explore ES6 features.
Variable Declarations
So far, we used to declare variables in JavaScript with the “var” keyword. Now with ES6, we have two new ways, “let” and “const.”
Let’s do a few demos to understand the issues in traditional methodology
Traditional way
Demo 1
Create a JavaScript file “Variable_Declaration.js” with the following block of code.
//Demo 1
console.log(a);
Now, just buy yourself some time and try to answer what the output will be if the above code is executed.
Open a command prompt and navigate to the folder where the above file is saved and execute it using the “node” command as follows.
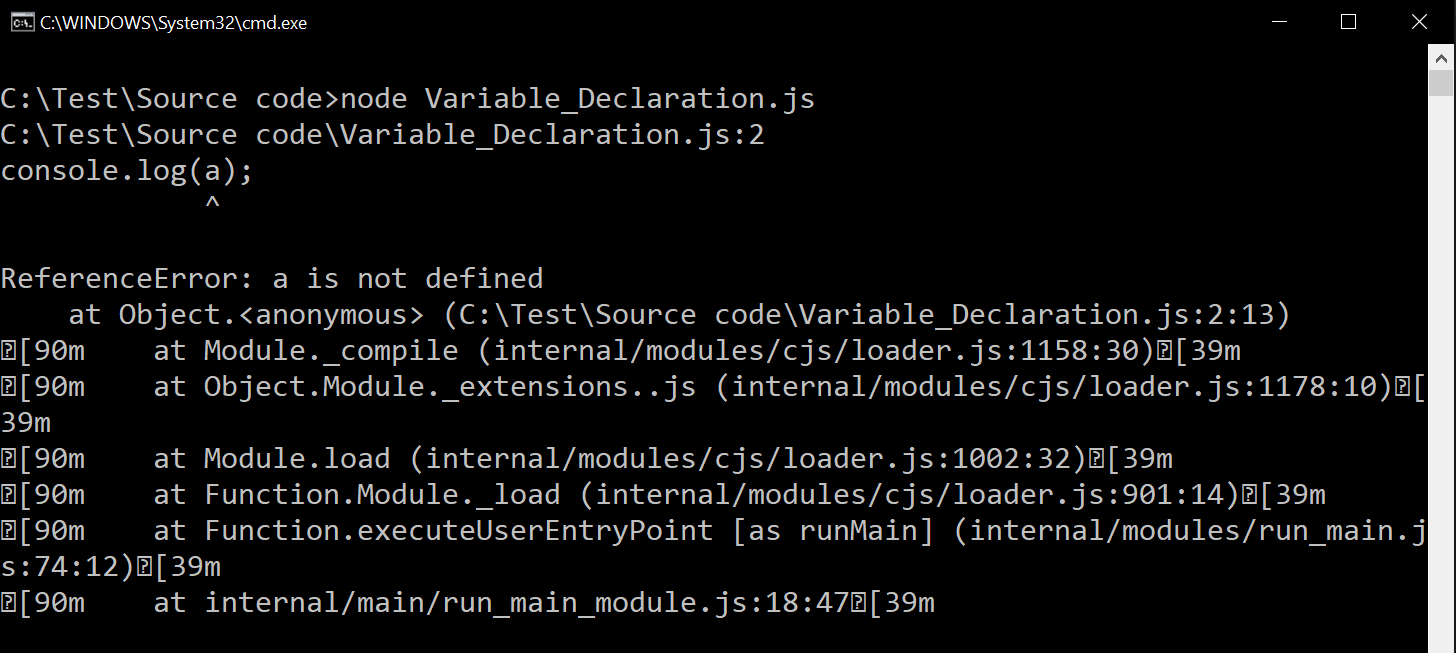
Variable was not defined. Hence we got the run-time error.
Demo 2
Now replace the code with the following code and try the output.
var a;
console.log(a);
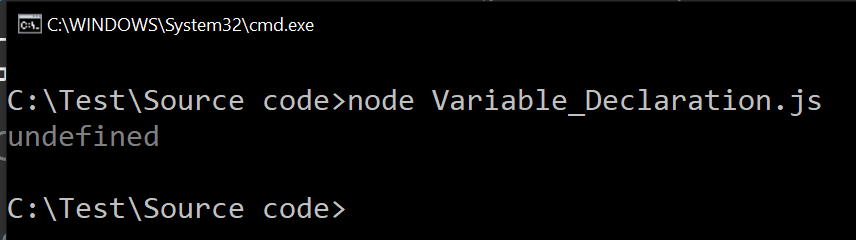
Again, a very much expected output. In JavaScript, by default, a variable will have value “undefined” if it is declared but never assigned any value.
Don’t confuse “undefined” with “null.” In JavaScript, “null” is a value developer explicitly assign to variables to indicate that there is no value, whereas “undefined” means the value is never assigned.
Again, nothing unusual in this demo.
Demo 3
//Demo 3
console.log(a);
var a;
What output is expected now? Logically we are supposed to get “not defined error” because we are using a variable before it is declared. Let’s try.


How come we got “undefined”?
In JavaScript, variables declared with var keyword hoisted up. This concept is called “Hoisting.” So, no matter where you state variable, it will always be considered as top-level variables. In simple words, all variable declarations go up.
Demo 4
//Demo 4
console.log(a);
var a=8;
The output will remain the same – “undefined” because I said variable declaration goes up, not assignment. You can consider the above code as a three-step code.
//Demo 4
console.log(a);
var a;
a=8
the only second line (that is “var a;”) goes up.
Demo 5
Next try below code.
//Demo 5
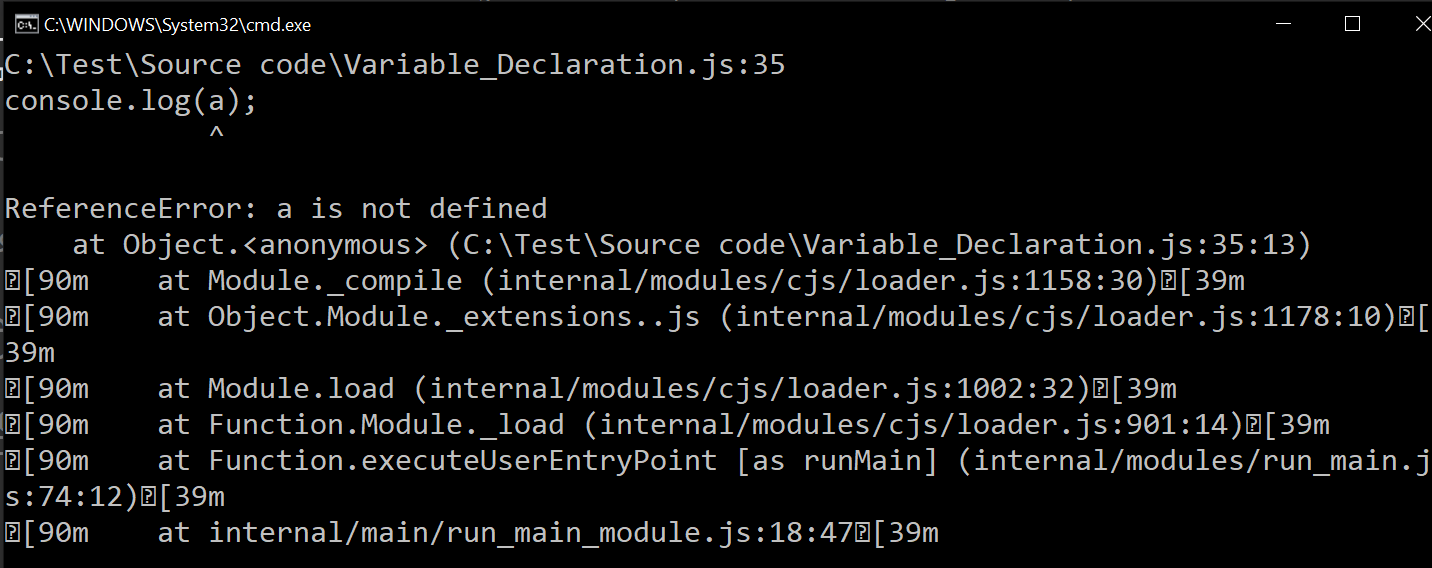
console.log(a);
if(false) {
var a;
}

Aren’t we supposed to get a run-time error this time? If it weren’t JavaScript, then probably, I would have said “Yes” as the variable is declared inside the “if” block. JavaScript doesn’t support block-level variables (at least when declared using “var” keyword), and hence all the variables declared inside any conditional or iteration blocks get the outer scope.
In the above example, the variable will be hoisted up to the top; hence we get “undefined” as output.
Demo 6
So, you must have got a clear idea that the variable declared using “var” keyword goes up (hoisting) and won’t be considered as block-level variables. Let me show a real case issue because of such behavior.
Assume that we have existing code as follows.
//Demo 6
var a=10;
console.log(a);
if(true) {
  //Some logic
}
console.log(a);
We will get “10” as output for both “console.log.”
Now, imagine that a new change in application expects some more code to be added inside the “if” block. The new developer doesn’t have very much idea about the existing code.
Assume that he does changes and ends up into the following code.
//Demo 6
var a=10; // Old code - unaffected
console.log(a);// Old code - unaffected -Expecting 10 as output
if(true){
  //Some logic
    var a=9; // new code
   console.log(a);// New code - unaffected -Expecting 9 as output
}
console.log(a);// Old code - unaffected -Expecting 10 as output
Execute it using “node” and examine the output.
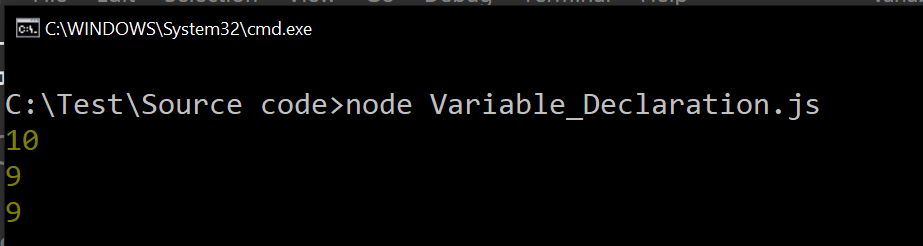
The new code impacted the existing one as well.

I know you are sad because it’s a little confusing and unexpected. Don’t worry. That’s why a new way of declaring a variable is introduced in ES6.
Creating private variables with “var” keyword
For that we need to create functions. Functions have their own scope.
//Demo 7
console.log(a);
myFunction();
function myFunction(){
   var a;
}
As you can see, variable “a” is not accessible outside the function.
It’s a logical way of making variables private in JavaScript.
New way
ES6 “let” keyword will solve all the problems found with the “var” keyword.
Create another file “Variable_Declaration2.js” with the following code.
Demo 1
 //Demo 1
console.log(a);
let a;
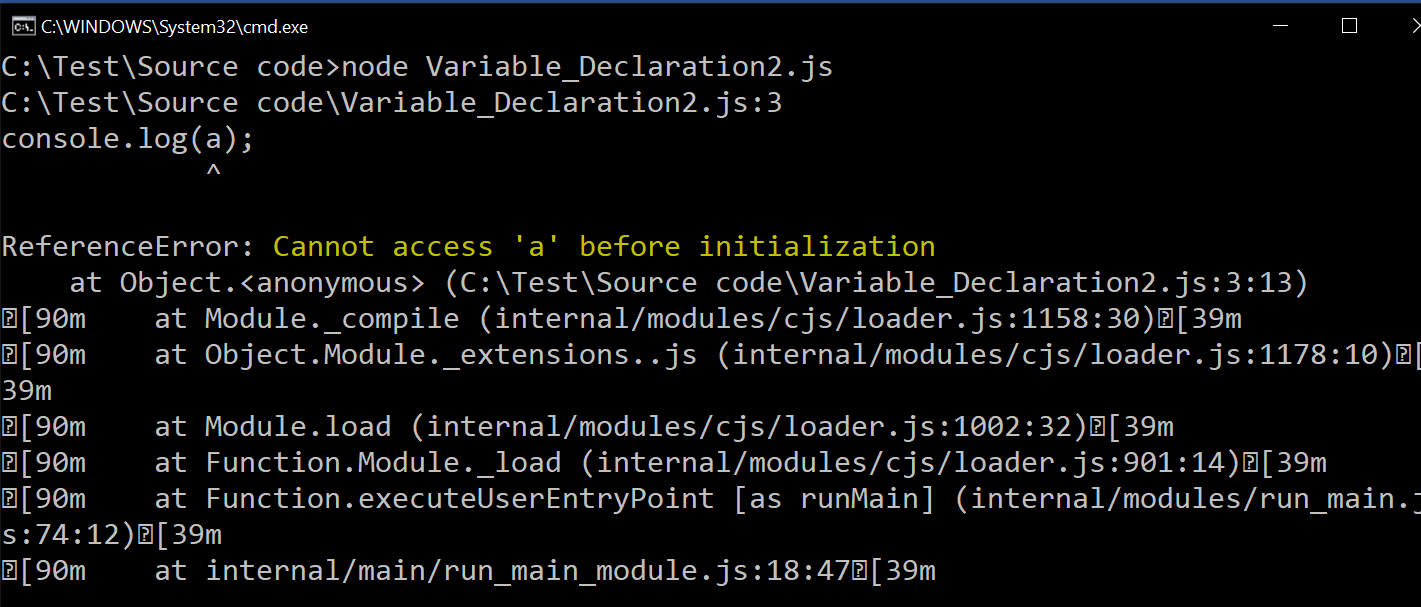
Now it is enforcing us to declare variables before getting used. In short, “There is no hoisting now.”
Demo 2
//Demo 2
if(true){
  let a;
}
console.log(a);
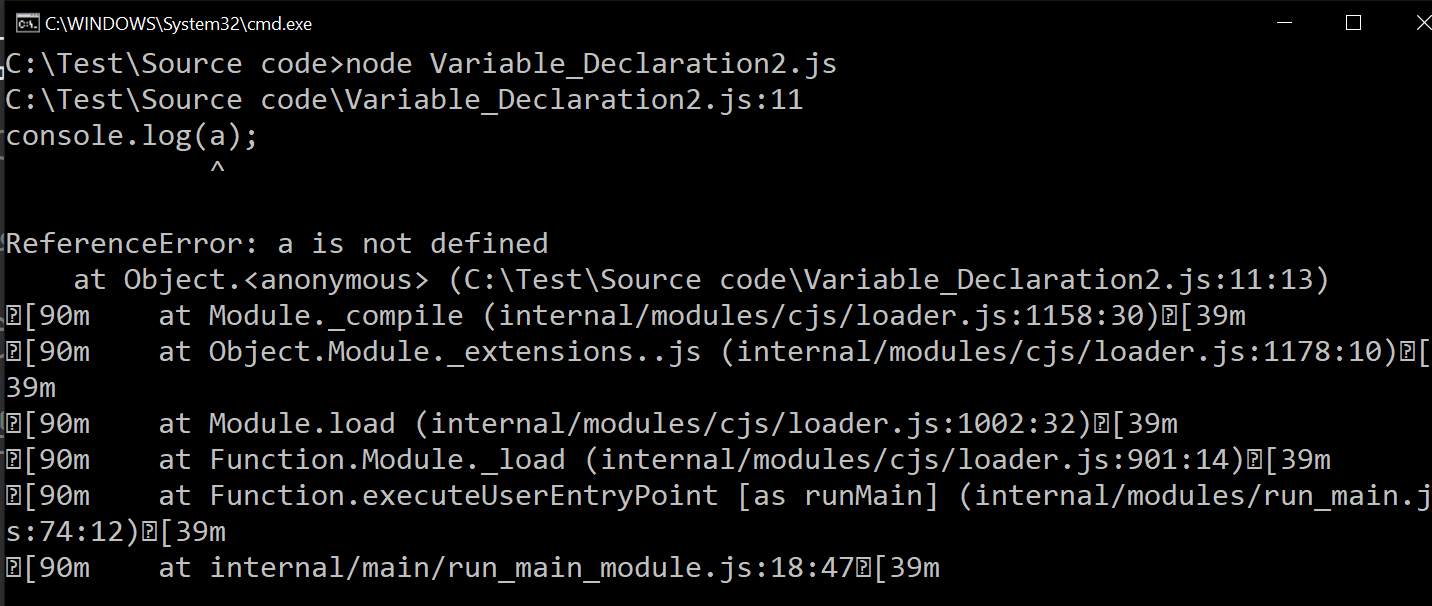
As you can see, now, variables are considered as “block-level variables.”
Demo 3
//Demo 3
let a=10; // Old code - unaffected
console.log(a);// Old code - unaffected -Expecting 10 as output
if(true){
  //Some logic
  let a=9; // new code
  console.log(a);// New code - unaffected -Expecting 9 as output
}
console.log(a);// Old code - unaffected -Expecting 10 as output
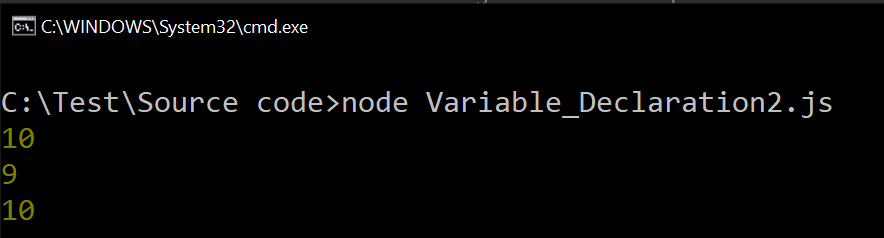
Life is straightforward when variables are declared with the “let” keyword.
Will these demos work with browsers?
It depends on the browser and the version of the browser. If the browser supports ES6 “let” keyword, then it will work, or else it won’t, and this is true for all ES6 features.
For now, just relax and continue your learning.
Constant variables
ES6 also has support for constant variables.
Create a JavaScript file “Constant_Declaration.js” with the following block of code.
const c=10;
c=20
console.log(c);
Execute it.
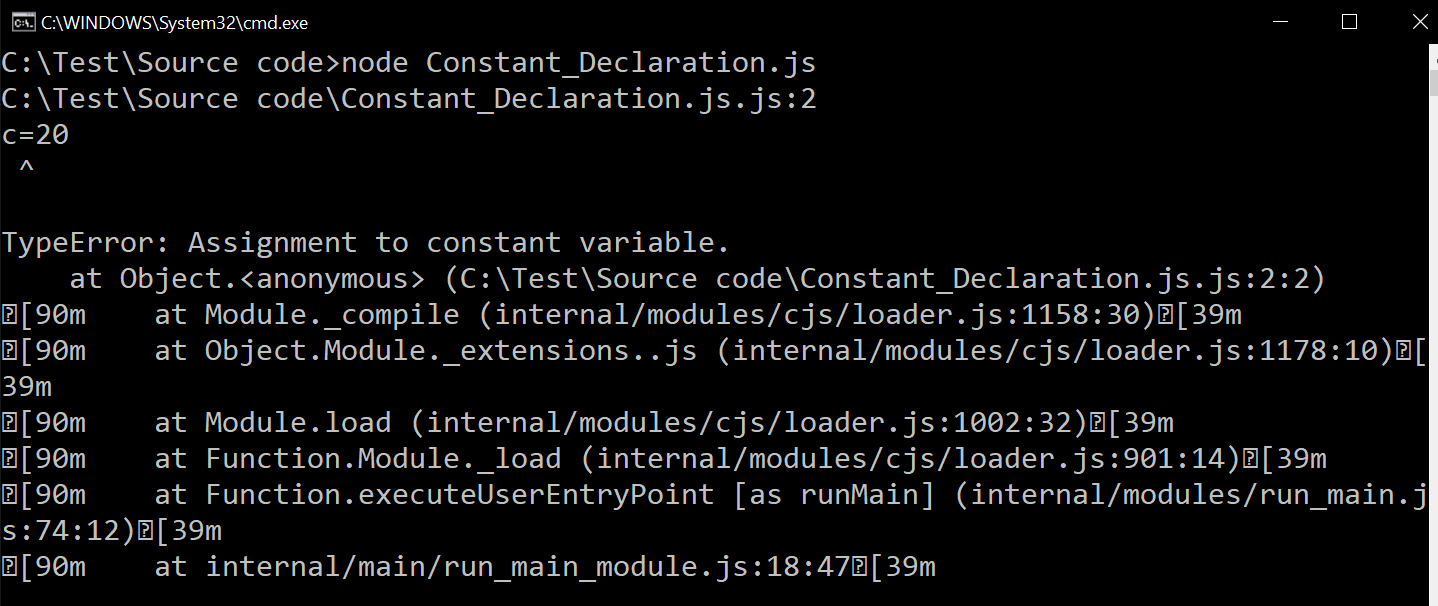
As you can see, we are getting an error when we tried to change the value of a variable that is declared with the “const” keyword.
It shares the similar behavior of “let” keyword that is “no hoisting,” and variables will be considered as block-level variables.
Object-oriented programming
With ES6, you have support for classes in JavaScript world.
Before ES6, object-oriented programming was not straight forward in JavaScript world. We were using logical concepts such as IIFE, Closures, Constructor functions for implementing an object-oriented style of coding. ES6 bought a “class” keyword using which we can create classes straightforward, just like any other programming language.
Demo 1
Create a new JavaScript File and name it “oops.js” with the following contents.
class Customer{
Save(){
console.log("Customer Saved: "+this.CustomerName+"("+this.Designation+"-"+this.CompanyName+")");
}
}
let c=new Customer();
c.CustomerName= ‘Sukesh Marla’;
c.Designation= ‘Director’;
c.CompanyName= ‘Just Compile’;
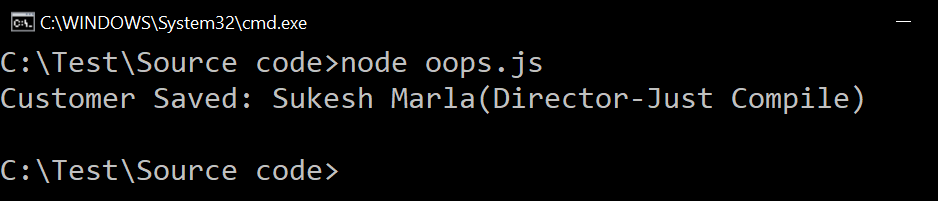
c.Save();
Let’s analyze the code.
- Class is created using the “class” keyword.
- The instance of the class is created using “new” keyword.
- Class members are accessed using “.” Operator.
- Inside the class, members are accessed using “this” keyword.
It’s a straightforward code for any object-oriented programmer.
The only strange thing compares to other object-oriented language is, “CustomerName” and other member variables are not explicitly declared inside a class.
Well, now that’s how JavaScript behaves. JavaScript is dynamic. Member variables got created at run-time when statement “c.CustomerName = ‘SukeshMarla’” got executed.
Let’s execute the code with the “node” command.
Demo 2
In Demo 2, we will learn how to create constructors.
In JavaScript, constructor syntax is very different. Here we won’t follow the rule of “class name, and constructor name should match” instead for creating constructor simple “constructor” keyword is used.
//Demo2
class Customer{
constructor(CustomerName,CompanyName,Designation){
this.CustomerName=CustomerName;
this.CompanyName=CompanyName;
this.Designation=Designation;
}
Save(){
console.log("Customer Saved: "+this.CustomerName+"("+this.Designation+"-"+this.CompanyName+")");
}
}
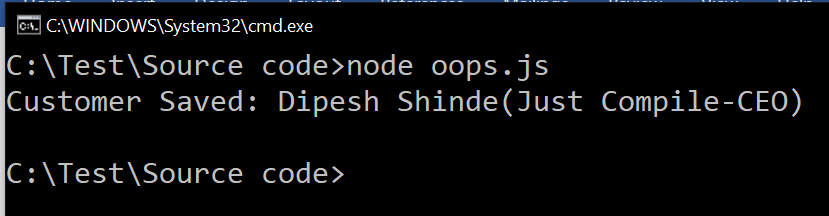
let c=new Customer("Dipesh Shinde","CEO","Just Compile");
c.Save();
Demo 3
Next let’s do a simple inheritance example.
//Demo 3.1
class Customer{
constructor(CustomerName,CompanyName,Designation){
this.CustomerName=CustomerName;
this.CompanyName=CompanyName;
this.Designation=Designation;
}
Save(){
console.log("Customer Saved: "+this.CustomerName+"("+this.Designation+"-"+this.CompanyName+")");
}
}
class GoldCustomer extends Customer{
}
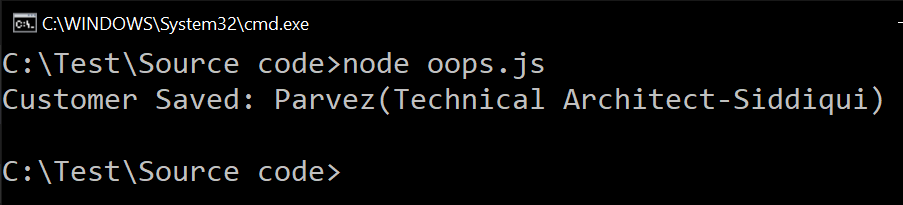
let c=new GoldCustomer("Parvez","Siddiqui","Technical Architect");
c.Save();
We do inheritance in JavaScript using the “extends” keyword.
Did you notice? “GoldCustomer” class doesn’t have any constructor defined in it, but still, while creating an instance of it, we are passing three parameters.
Well, that’s kind of new behavior for a static language programmer such as C++ or C#.
The above code will directly make a call to the base class constructor.
On execution, you will get the following output.
Next, lets create empty constructor in derived class and check the behavior.
//Demo3.2
class Customer{
    constructor(CustomerName,CompanyName,Designation){
        this.CustomerName=CustomerName;
        this.CompanyName=CompanyName;
        this.Designation=Designation;
    }
    Save(){
        console.log("Customer Saved: "+this.CustomerName+"("+this.Designation+"-"+this.CompanyName+")");
    }
}
class GoldCustomer extends Customer{
    constructor(){}
}
let c=new GoldCustomer("Parvez","Siddiqui","Technical Architect");
c.Save();
The output will be an error.
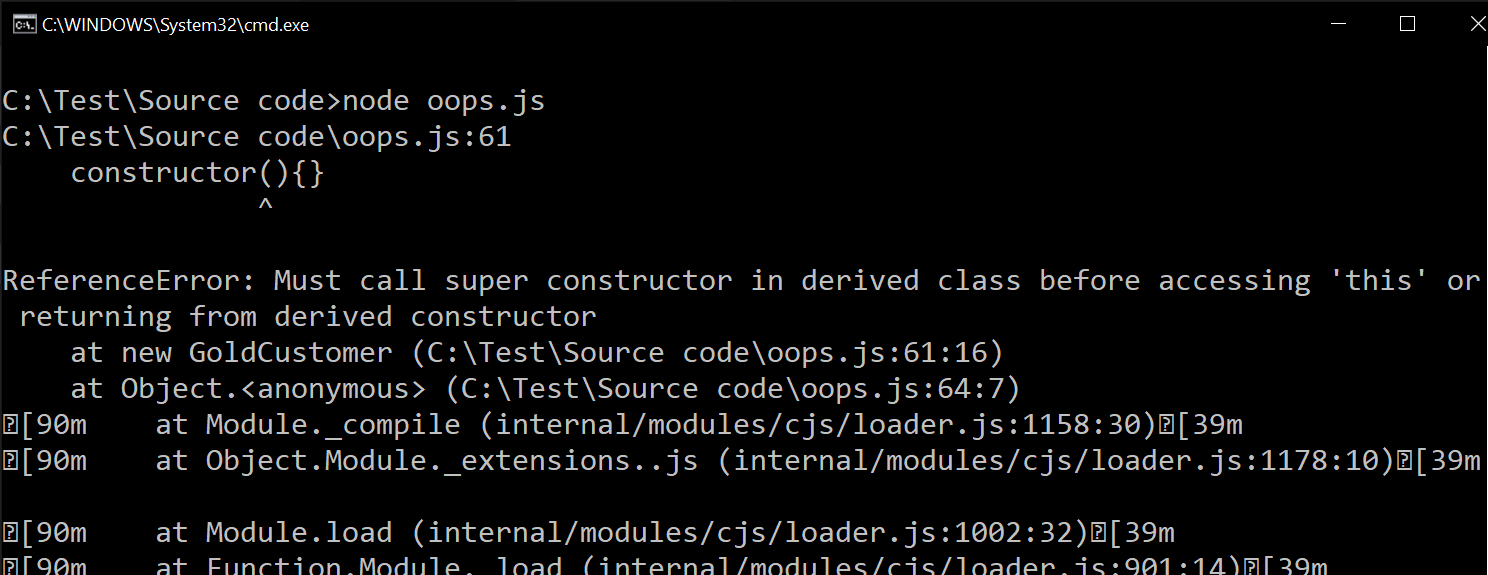
The rule says, While inheritance if derived class have constructor then “Derived class constructor must explicitly call the base class constructor.”
Let’s do it.
//Demo3.3
class Customer{
    constructor(CustomerName,CompanyName,Designation){
        this.CustomerName=CustomerName;
        this.CompanyName=CompanyName;
        this.Designation=Designation;
    }
    Save(){
        console.log("Customer Saved: "+this.CustomerName+"("+this.Designation+"-"+this.CompanyName+")");
    }
}
class GoldCustomer extends Customer{
    constructor(){
        super();
    }
}

let c=new GoldCustomer("Parvez","Siddiqui","Technical Architect");
c.Save();
The output will be as follows.
- “GoldCustomer” class constructor doesn’t have any parameter. Hence all the parameters passed to constructor got ignored.
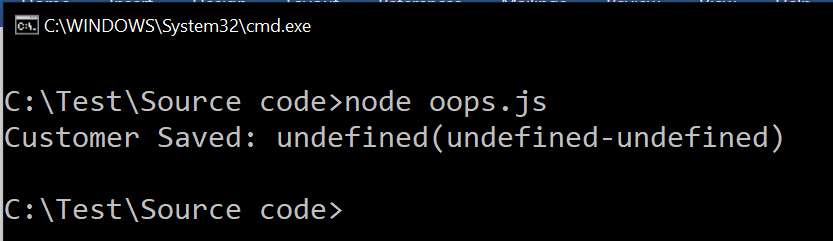
- Superclass (base class) constructor is invoked without passing any parameter. So, all three “CustomerName,” “CompanyName,” and “Designation,” will get “undefined” as value.
- Hence, we are getting the above output.
Rewrite the code as following.
//Demo3.4
class Customer{
    constructor(CustomerName,CompanyName,Designation){
        this.CustomerName=CustomerName;
        this.CompanyName=CompanyName;
        this.Designation=Designation;
    }
    Save(){
        console.log("Customer Saved: "+this.CustomerName+"("+this.Designation+"-"+this.CompanyName+")");
    }
}
class GoldCustomer extends Customer{
    constructor(CustomerName,CompanyName,Designation){
        super(CustomerName,CompanyName,Designation);
    }
}

let c=new GoldCustomer("Parvez","Siddiqui","Technical Architect");
c.Save();
Execute it like before.

- This time, the “GoldCustomer” class has a constructor with three parameters.
- In the “GoldCustomer” constructor, we are making a call to “Customer” class constructor, passing those three values as parameters.
String Interpolation
It’s a small but exciting and useful feature in ES6.
Look at the following demo.
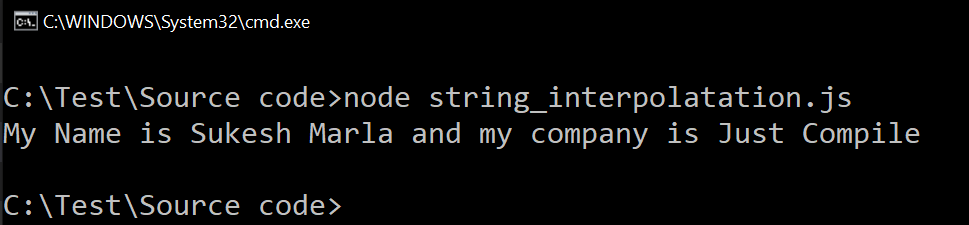
//Demo 1
let myName="Sukesh Marla";
let myCompany="Just Compile";
console.log("My Name is "+myName+" and my company is "+myCompany)
The output will be as follows.
The only problem with such kind of coding is difficulty in the concatenation.
We end up into a lot of “+,” which makes code unreadable, plus many times we miss something.
For instance, look at the following code.
//Demo 2
let myName="Sukesh Marla";
let myCompany="Just Compile";
console.log("My Name is "+myName+" and my company is"+myCompany)
Can you identify the difference between Demo 1 and Demo 2?
If no, then check the output of the above code.
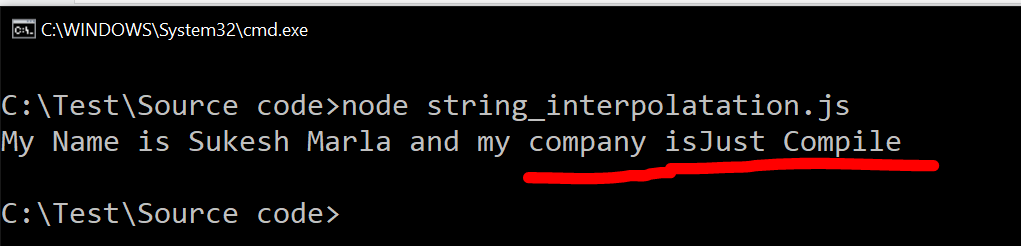
The difference was simple “space” between “is” and “Just Compile.”
Concatenation is made more comfortable with the help of “string interpolation” in ES6.
For that, we will use tick (`) symbol instead of double quotes (“ & ”) and single quotes (‘ & ’). For representing dynamic values, we will write “$” followed by curly braces ({}), and inside those curly braces, we will put the variable. Check the below code.
//Demo 3
let myName="Sukesh Marla";
let myCompany="Just Compile";
console.log(`My Name is ${myName} and my company is ${myCompany}`)
The output will be unaffected.

Enhanced Object literals
Let’s understand it with a quick demo.
Look at the following code.
let CustomerName="Ramlal";
let Address="Ramgarh";
let Customer={CustomerName:CustomerName, Address:Address};
console.log(Customer);
The above code is intuitive and easy. We are simply creating a new JavaScript object “Customer” with keys “CustomerName” and “Address.”
Let’s check the output.
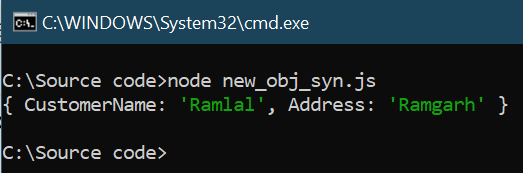
Did you notice? The property name of the “Customer” object and name of a variable is the same. (CustomerName and Address).

In ES6, when both left-hand and right-hand variable have same name then code can be re-written as follows.
let CustomerName="Ramlal";
let Address="Ramgarh";
let Customer={CustomerName,Address};
console.log(Customer);
Spread Operator
As the name implies, it’s an operator used to spread something.
What it spreads?
It spreads objects and collections.
Let’s do a couple of demos to understand better.
Demo 1 – Combining two arrays
Let’s say we have two arrays as follows.
let a=[1,2,3];
let b=[6,7];
Our goal is to create a third array combining elements of the other two.
Do you think below code will do the work?
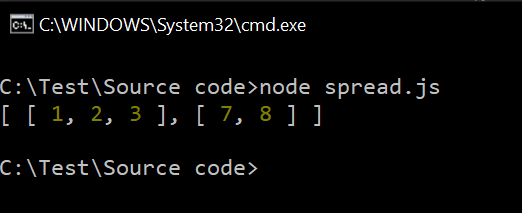
let c=[a,b];
console.log(c);
The above code will create a new array with just two elements, both of which will be again an array. Check the below output.
Now rewrite the same code using spread operator as follows.
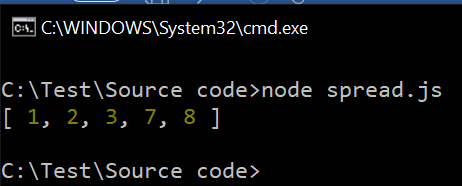
let a = [1,2,3];
let b = [6,7];

let c = [...a,...b];
console.log(c);
Did you notice “…” that is three dots in the above code? That is how the spread operator is written. It simply unzipped the values from the array and put it there. Now we will get the desired output.
Demo 2 – Cloning an Array
Let’s say we have an array like below.
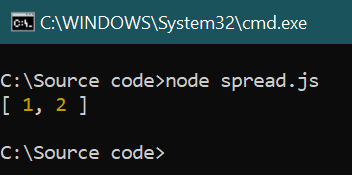
let a = [1,2];
Our goal is to create a new array containing the same elements as the above array.
We can think of following three ways.
//let b=a;
//let b=[a];
//let b=[...a];
Which of the above is correct, according to you?
The first one ends up in a reference copy.
let b=a;
console.log(b);
let’s check the output.
It seems we got the desired output but, we haven’t.
Let me prove. Simply add one more element to the first array.
let a=[1,2];
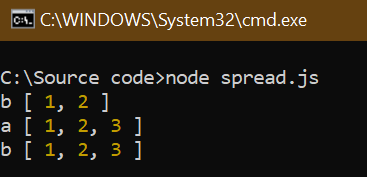
let a=[1,2];

let b=a;
console.log("b",b);

a.push(3);
console.log("a",a);
console.log("b",b);
You will notice a change in second array also.
So, for sure, the first one is no way to go.
The second one ends up into a new array with just one element, which itself will be an array.
Let’s try.
let a=[1,2];

let b=[a];
console.log("b",b);
Third one with spread operator will be our solution.
let a=[1,2];
let b=[...a];
console.log("b",b);

Demo 3 – Merge two JavaScript objects
Spread operator can be used with JavaScript objects also.
Consider we have the following JavaScript objects, and our target is creating a third JavaScript object combining those two.
var a={Name:"Sukesh Marla", CompanyName:"Just Compile"};
var b={Technology:"JavaScript"};
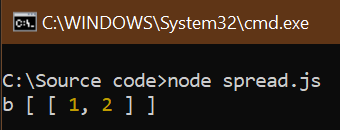
Let’s try the following code.
var c={a,b};
console.log(c);
It will create a new JavaScript object with two keys, a and b. Let’s check.
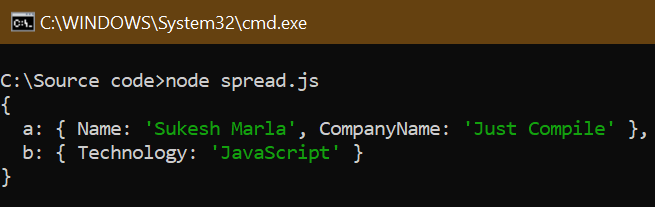
That’s not the output we are desired.
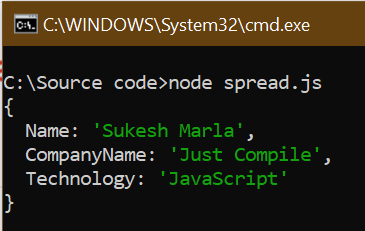
Let’s try the same thing using the spread operator.
var a={Name:"Sukesh Marla", CompanyName:"Just Compile"};
var b={Technology:"JavaScript"};
var c={...a,...b};
console.log(c);
Did you notice spread operator in above code? It simply got as what we were waiting for.
The mighty for-of loop
I firmly believe you must have written a lot of code already using JavaScript’s “for” and “for…in” loops.
Now there is a new “for…of” loop. It let us loop over collections in much a better way.
Consider we have the following array.
let a=["A","B","C","D"];
Our target is displaying each element of the array in the console.
With ES5, we would have done it in one of the following ways.
for(let index=0;index<a.length;index++){
    console.log(a[index]);
}
OR
for(let index in a){
    console.log(a[index]);
}
“for…in” is just a syntactic sugar for “for” loop.
Now, with ES6, there is one more and much cleaner way, and that is “for…of.”
for(let element of a){
    console.log(element);
}
REST parameters
Are you aware of the “arguments” keyword in JavaScript? If yes, very good. If no, let’s learn it first.
Look at the following code.
function Add(){
    var result=0;
    for(let i of arguments)
    {
        result+=i;
    }
    console.log(result);
}
Add(1,2,3,4,5);
As you can see, the “Add” function doesn’t have any arguments explicitly declared, but while invoking, we are passing five values as parameters. How is that possible? It’s likely because JavaScript is dynamic, and that’s how it works.
In JavaScript, we have a keyword called “arguments,” which we can use inside the function, which will give us access to the parameters passed to it.
Now, the same code can be written in a much cleaner way as below.
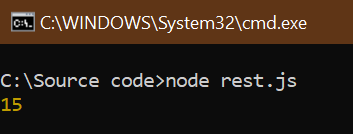
function Add(...numbers){
    var result=0;
    for(let i of numbers)
    {
        result+=i;
    }
    console.log(result);
}

Add(1,2,3,4,5);
Both the above codes will give us the same output.
Conclusion
Are we done with ES6? Did we reach Station 2?
Not yet. Stay tuned for part 2, where we discuss some more features of ES6.
I hope you have enjoyed this writing.
Stay tuned and practice well. Please drop comments and clap. It helps us to stay motivated to write more such series.
You can check me out on twitter @sukeshmarla.
In case you are looking for customized mobile or web application development, exclusive technical Consultancy for architecting your project, and want to train your people in advanced technologies, you can visit my company Just Compile or contact SukeshMarla@Gmail.com for details.

