Complete series source code can be downloaded from GitHub.

Good to see you here. Make sure the previous chapter is well-practiced
Complete series (Index)
— — — — — — — — — — — — — — — — — — — — — — — — — —— — —

— — — — — — — — — — — — — — — — — — — — — — — — —
Lab 2 – Bootstrap in Action
What are we going to create?
It’s a simple 10 step lab that will take the lab1 application and beautify it with Bootstrap.
Please note the purpose of this lab is not learning Bootstrap, which is a trendy CSS framework used in industry but to learn how to include a third-party library in an Angular application. We will also learn to use the “ngClass” directive in Angular.
Start the lab
Step 1 – Create a copy of the project
It’s better to create a copy of the lab1 project for this lab instead of using the same.
Step 2 – Install Bootstap
Next, install Bootstrap using the following command.
npm install Bootstrap --save
Discussion
Make sure to use “–save” flag with “npm install” or else dependencies section in packge.json will not update. Secondly, take care of casing with “npm install.”
Lab – Continued
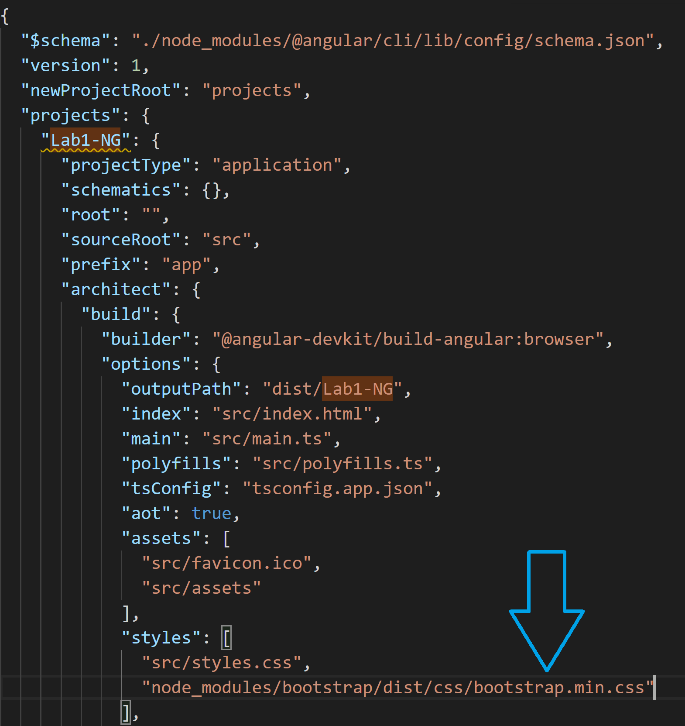
Step 3 – Include Bootstrap into projet
Open the “angular.json” file and include “boostrap.min.css” in the “styles” section as follows.
Discussion – Continued
As it’s a different lab, it’s better to rename the project to “lab2-ng” from “lab1-ng”. It’s a two-step process.
- Open “package.json” and “package.lock.json.” Both files contain a “name” attribute. Set it to “lab2-ng.”
- Now search “lab1-ng” in the “angular.json” file and replace it with “lab2-ng.”
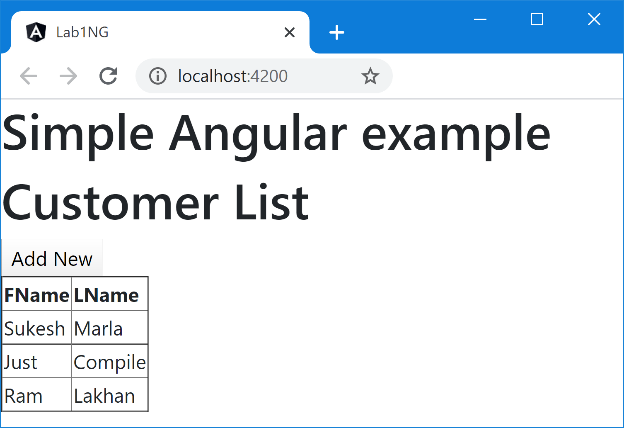
Lab 4 – Run the project
Execute the project using the “ng serve –open” command. You will notice the effect of “bootstrap” in the first execution itself. You will see a change in text font and table border.
Lab 5 – Remove the additional header
Remove the “Simple Angular example” header from “app.component.html.”
Lab 6- Redesign Customer List
Let’s apply some bootstrap classes to the table and button as follows.
<div class="container-fluid pt-3">
  <div class="card" [hidden]="IsAddNew">
    <h5 class="card-header">Customer List</h5>
    <div class="card-body" >
      <div class="card-title">
        <i class="fas fa-user-plus"></i>
        <input type="button" value="+ Add New" class="btn btn-primary fas fa-coffee fa-xs"  (click)="AddNew()">
      </div>

      <table class="table table-striped table-bordered">
        <thead class="thead-dark">
          <tr>
            <th scope="col">First Name</th>
            <th scope="col">Last Name</th>
          </tr>
        </thead>

        <tbody>
          <tr *ngFor="let item of Customers">
            <td scope="row">{{item.FName}}</td>
            <td>{{item.LName}}</td>
          </tr>
        </tbody>

      </table>

    </div>
  </div>

......<!-- Data entry form will be added here -->
</div>
Don’t worry much about the CSS classes used in the above step. The goal of this chapter is not to learn Bootstrap. It is to learn how to use a third-party library.
Lab 7 – Redesign Data entry screen
Now, its time for data entry screen.
<!-- Table was added in previous step here --> ...... <div class="card" [hidden]="!IsAddNew" ngForm #myForm="ngForm"> <h5 class="card-header">Add New Customer</h5> <div class="card-body"> <div class="form-group"> <label for="FName">First Name: </label> <input class="form-control" type="text" name="FName" [(ngModel)]="this.FirstName" required minlength="3" #F="ngModel"> <!-- error --> <div class="alert alert-danger" [hidden]="!(F.dirty && F.errors?.required)"> Enter First Name </div> <div class="alert alert-danger" [hidden]="!(F.dirty && F.errors?.minlength)"> Minimum 3 characters needed for First Name </div> </div> <div class="form-group"> <label for="LName">Last Name:</label> <input class="form-control" type="text" name="LName" [(ngModel)]="this.LastName" required minlength="3" #L="ngModel"> <!-- error --> <div class="alert alert-danger" [hidden]="!(L.dirty && L.errors?.required)"> Enter Last Name </div> <div class="alert alert-danger" [hidden]="!(L.dirty && L.errors?.minlength)"> Minimum 3 characters needed for Last Name </div> </div> <input type="button" class="btn btn-success" value="Save" (click)="Save()" [disabled]="myForm.invalid"> <input type="button" class="btn btn-default" value="Cancel" (click)="Cancel()"> </div> </div>
Step -8 Check the output
Let’s see how it looks now.
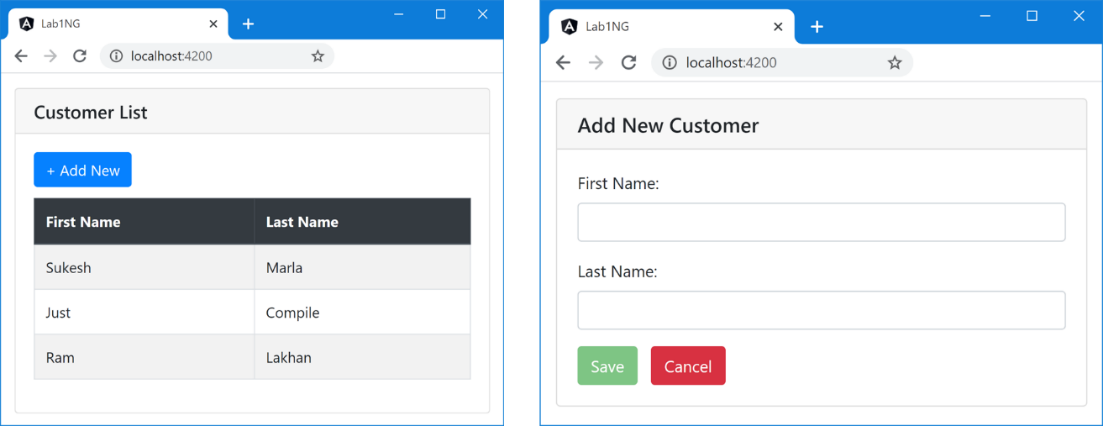
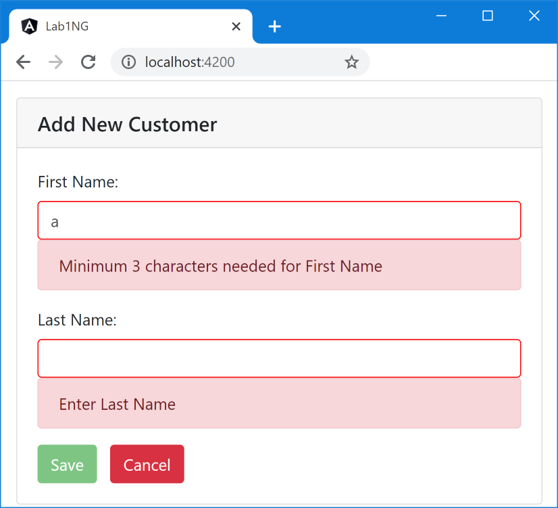
Pretty isn’t it. We can make it better.
Discussion – Continued
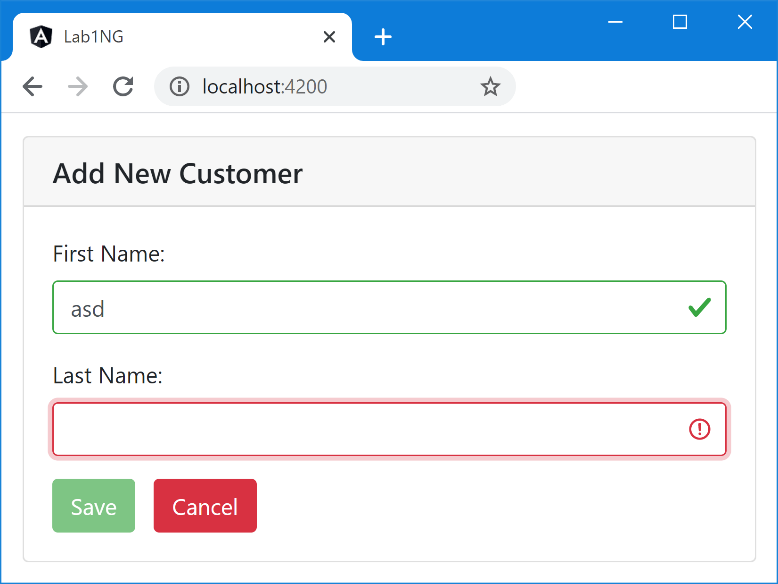
Bootstrap provides two helpful classes to deal with validation “is-valid” and “is-invalid.”
For using so, we will use an Attribute directive “ngClass” that will let us apply CSS classes to an element dynamically based on condition.
Lab – Continued
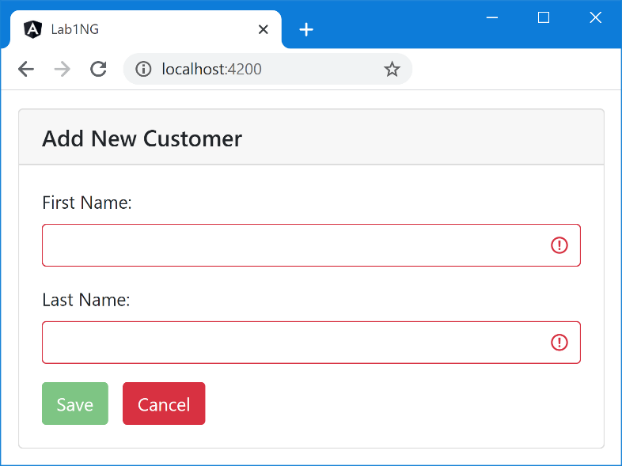
Step 9 – Attach Bootstrap CSS validation messages
First of all, remove CSS defined in “Style.css.” We won’t be needed anymore.
Then add “ngClass” directive to both textboxes as follows.
 <input class="form-control"
        [ngClass]="{'is-valid':F.valid,'is-invalid':F.invalid}" type="text" name="FName"
        [(ngModel)]="this.FirstName" required minlength="3" #F="ngModel">
<!-- Do same for Last Name-->
Step 10 – Check the output.
Conclusion
We reached Station 6. In this journey, we learned how to include a third-party library in Angular and so learned how to beautify it. Please practice before moving to the next chapter. See you in the next chapter.

